
-
- iTransfer Platinum Mac

- iPhone Transfer Platinum Mac
- iPad Mate Platinum Mac

- PodWorks Platinum Mac
- iPhone Ringtone Maker Mac
- iPhone Transfer Plus Mac
- iPad Mate for Mac
- PodWorks for Mac
- iPhone Contacts Transfer Mac
- DVD to Video for Mac
- DVD to MP4 Converter for Mac
- DVD to iPhone Converter for Mac
- Blu-ray to Video Converter for Mac
- DVD to iPad Converter for Mac
- DVD to Audio Converter for Mac
- DVD Creator for Mac
- Video Converter for Mac
- MP4 Converter for Mac
- 3D Movie Converter Mac
- Video Editor 2 for Mac
- Audio Converter Pro Mac
- YouTube Video Converter for Mac
- Download YouTube Video for Mac
- YouTube HD Video Downloader Mac
- YouTube to iTunes Converter Mac

- YouTube to iPhone Converter Mac
- HEVC/H.265 Converter for Mac
- iTransfer Platinum Mac
- More
How to add subtitles to your DVD? 

I want to burn a dvd with a mp4 movie including its subtitle which can be playable at home dvd player...most importantly without any video quality loss,with subtitle and less weight so that I can burn as many movies as i can in a DVD5 or DVD9...How do I do it?
This tutorial will show you how to create DVD disc from mp4 movie including its subtitle with ImTOO DVD Creator step by step.
Before you start, please download, install and launch ImTOO DVD Creator.
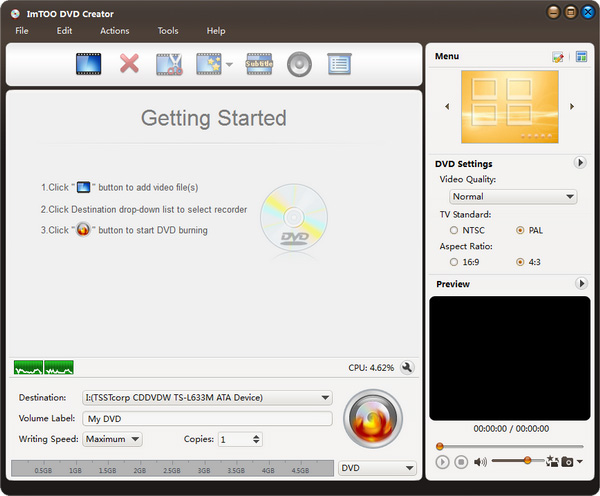
Step 1: Getting Started
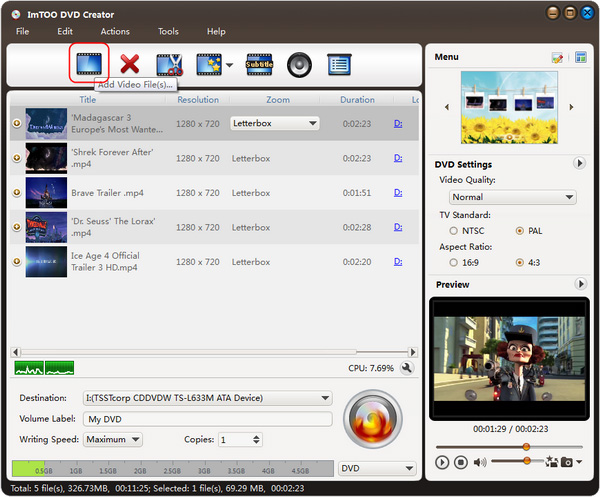
Step 2: Load video files
Click "Add Video File(s)" button on the toolbar or click "File > Add Video File(s)..." option from the main menu to load the video files you want to burn.
Or click "File > Add Video Folder..." option from the main menu to choose a folder and load all the video files in this folder into the file list.
Step 3. Add subtitles
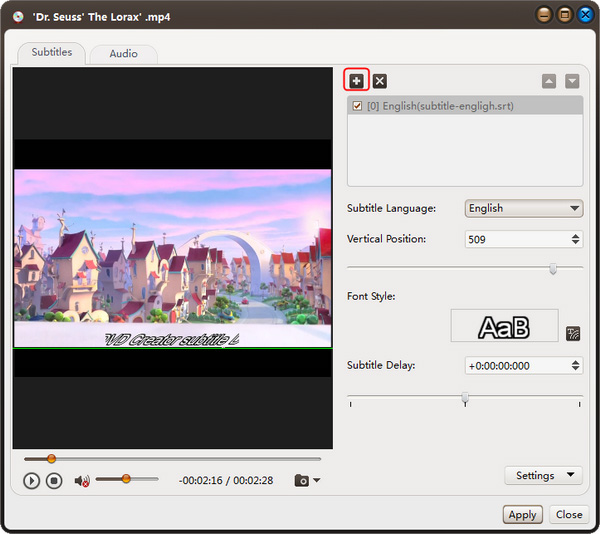
Step 1: Choose a video file in the file list, then click "Subtitle" button on the toolbar to enter the subtitle window, on which click the plus icon on the right panel to choose the subtitle you want to add in the dialog that opens, then the subtitle is displayed in the subtitle list. You can add up to 8 subtitles into the video.
Step 2: Choose a subtitle from the subtitle list, and then choose a language from the "Subtitle Language" drop-down list, and according to your own need, adjust its vertical position and font style.
Step 3: If the subtitle is not synchronous with the video, then drag the "Subtitle Delay" slider left or right to set the delay time, or just enter the delay time in the textbox, or select the time in the textbox and click the up or down arrow to adjust it higher or lower.
Step 4: If you want to set this subtitle as the default one when DVD plays, then click the up arrow on the right top of the subtitle list to move it up to the first place in the list.
Step 5: After adding and editing subtitles, click "Apply" and "OK" to return to the main interface.
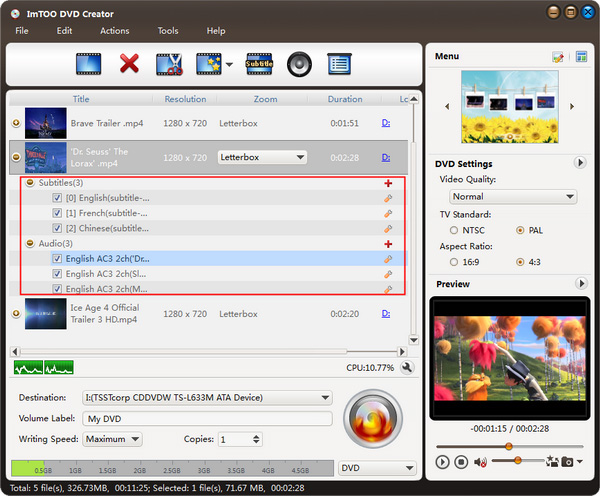
Click the plus icon before the video file to expand its subtitle items, you will find the subtitles you added are listed below the video file. Click the plus icon in the row of the subtitle item to add subtitle in the dialog that opens and the pen icon to edit subtitle in the window above.
Step 4. Add audio tracks
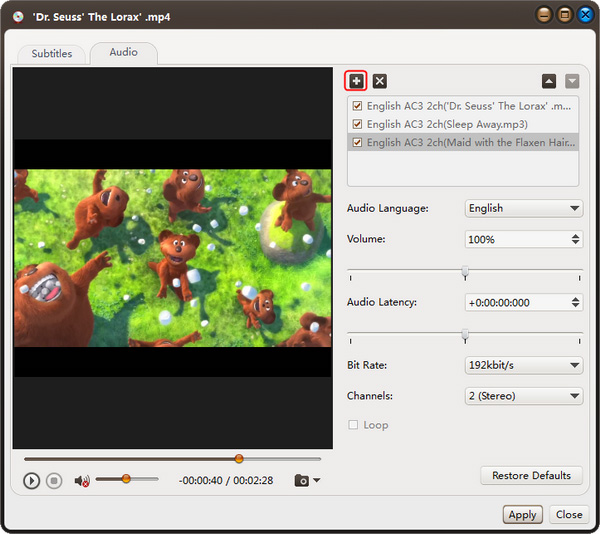
Step 1: Choose a video file in the file list, then click "Audio" button on the toolbar to enter the audio track window, on which click the plus icon on the right panel to choose the audio track you want to add in the dialog that opens, then the audio track is displayed in the audio track list. You can add up to 8 audio tracks into the video.
Step 2: Choose an audio track from the audio track list, and then choose a language from the "Audio Language" drop-down list, and according to your own need, adjust its volume, bit rate, and channels.
Step 3: If the subtitle is not synchronous with the video, then drag the "Audio Latency" slider left or right to set the latency time, or just enter the latency time in the textbox, or select the time in the textbox and click the up or down arrow to adjust it higher or lower.
Step 4: If you want to set this audio track as the default one when DVD plays, then click the up arrow on the right top of the audio track list to move it up to the first place in the list.
Step 5: After adding and editing audio tracks, click "Apply" and "OK" to return to the main interface.
Click the plus icon before the video file to expand its audio track items, you will find the audio tracks you added are listed below the video file. Click the plus icon in the row of the audio item to add audio track in the dialog that opens and the pen icon to edit audio track in the window above.
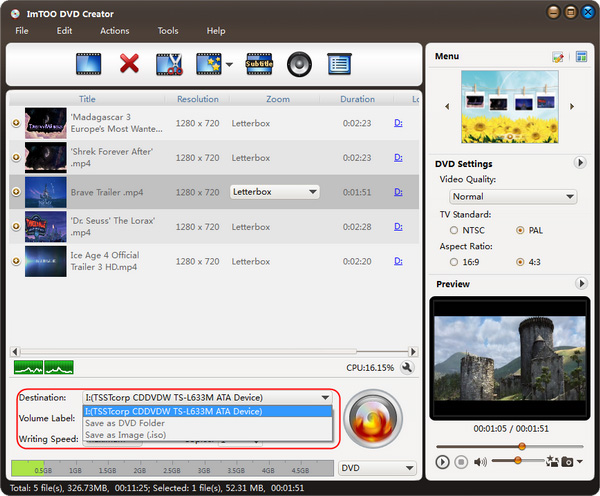
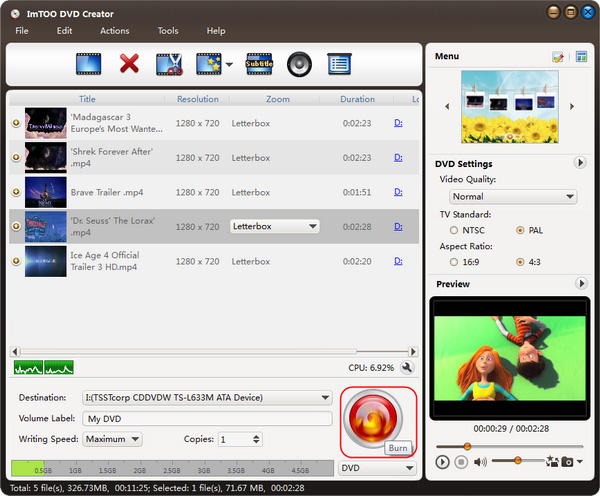
Step 5: Adjust output settings
Destination: Insert a recordable disc, and choose the disc you insert from the "Destination" drop-down list. Or choose "Save as DVD Folder" or "Save as Image (.iso)" option to back up your video files onto your hard disk as DVD folder or ISO image.
DVD Name: Enter a name in the textbox as the DVD name.
Writing Speed: According to your CPU configuration, choose an appropriate speed from the drop-down list.
Copies: Click the up and down arrows to set the number of copies you want to burn. If you set it to more than 1, the program will prompt you to insert a new recordable disc after burning a copy.
Step 6: Create DVD menu
Click "Templates" button on the menu panel, "Menu Templates" window pops up. Choose your favorite template from this window to create a menu instantly.
For further menu editing, please click "Edit" button on the menu panel to open "Menu Edit" window, in which you can change the template, add background music/picture, title and opening film to your menu.
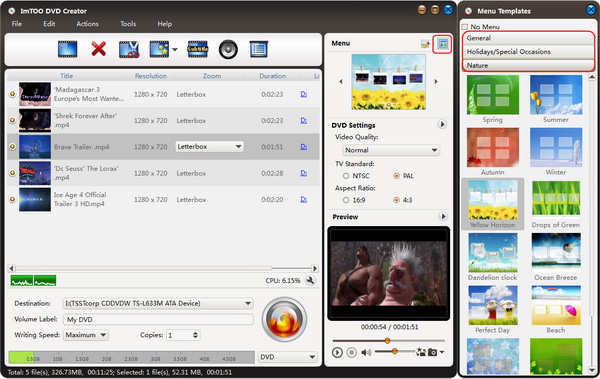
If you don't want DVD menu, click "No menu".
Step 7: Start creating DVD
Click "Burn" button at the right bottom of the file list to start burning.
Tips:
1. If you want to do more settings with your video files before burning, please refer to "Part 2: Customize Video Files".
2. You can preview any video file and take snapshot in the player at the right bottom. Select the file in the file list, and click "Play" button in the player to play the file. When the video jumps to the image you like, click "Snapshot" button to store the image in the snapshot folder.