
-
- iTransfer Platinum Mac

- iPhone Transfer Platinum Mac
- iPad Mate Platinum Mac

- PodWorks Platinum Mac
- iPhone Ringtone Maker Mac
- iPhone Transfer Plus Mac
- iPad Mate for Mac
- PodWorks for Mac
- iPhone Contacts Transfer Mac
- DVD to Video for Mac
- DVD to MP4 Converter for Mac
- DVD to iPhone Converter for Mac
- Blu-ray to Video Converter for Mac
- DVD to iPad Converter for Mac
- DVD to Audio Converter for Mac
- DVD Creator for Mac
- Video Converter for Mac
- MP4 Converter for Mac
- 3D Movie Converter Mac
- Video Editor 2 for Mac
- Audio Converter Pro Mac
- YouTube Video Converter for Mac
- Download YouTube Video for Mac
- YouTube HD Video Downloader Mac
- YouTube to iTunes Converter Mac

- YouTube to iPhone Converter Mac
- HEVC/H.265 Converter for Mac
- iTransfer Platinum Mac
- More
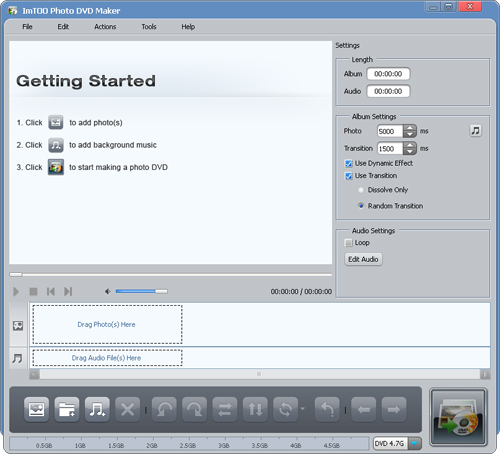
ImTOO Photo DVD Maker Guide
This tutorial shows you how to convert your photo collection into DVD disc with ImTOO Photo DVD Maker step by step.
ImTOO Photo DVD Maker offers the best solution to convert your entire photo collection to DVD movies, burn them onto DVDs, and view them from your DVD players. With it, making a DVD from your photos couldn't be easier: drag and drop your photos, insert a blank DVD, then simply hit the "Burn" button!
In general this article is divided into several parts as below.
Part 1: Create a Photo DVD
Part 2: More Applied Functions
Firstly, download ImTOO Photo DVD Maker, install and run it.
Part 1: Create a Photo DVD
Step1: Add photos
Click “Import Photo(s)” button on the toolbar, then select one or more photos in the dialog that opens, close the dialog and return to the main window, then the photos you selected will be displayed in the photo list.
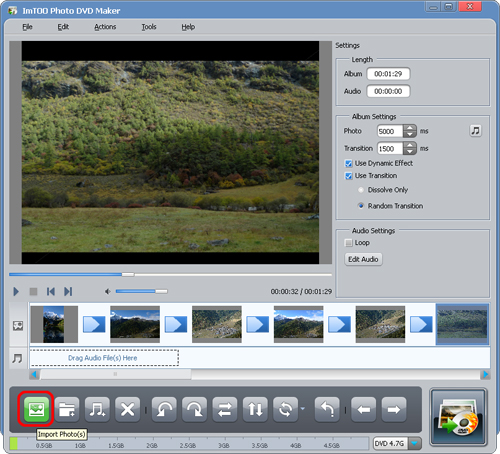
Or click “Import Photo Folder” button on the toolbar, then select a folder to load all the photos in this folder.
Tip:
- You can also load photos in the way below:
- Click to select “File > Import Photo(s)...” or “File > Import Photo Folder...” on the main menu to add one or more photos.
- Or drag and drop the photos you want to the photo list on the main window.
Step2: Edit photos and add transitions
Click to select one or more photos in the photo list, then click “Turn Left”, "Turn Right”, "Mirror”, "Flip” buttons to edit their directions. To restore the default direction, please click “Restore” button.
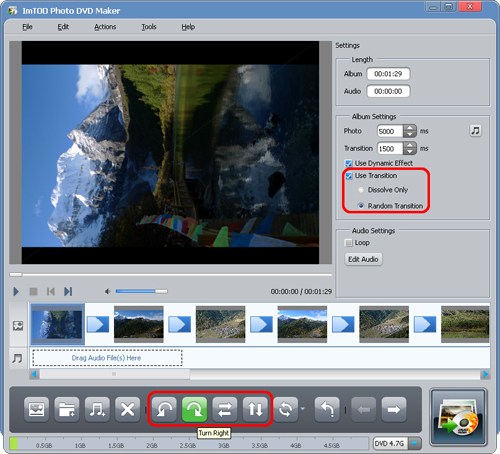
From the settings panel on the right, you can set the transition to “Dissolve Only” or “Random Transition”. If you uncheck "Use Transition” option, then no transitions will be added in between the photos.
Tip: If you want to adjust the play order of the photos, click “Move Left” or “Move Right” button to make adjustment.
Step3: Add soundtracks
You can add your favorite music as the background music. To do this, click “Import Audio File(s)” button on the toolbar to select one or more audio files in the dialog that opens. In the “Audio Settings” area on the settings panel, you can check "Loop” options as required.

Tip: You can also drag and drop audio files to the audio list on the main window.
Step4: Burn DVD
After the above steps, click to open the drop-down list on the right of the DVD capacity status bar, then set the disc type as "DVD 4.7G” or “DVD 8.5G”.
Insert a blank or rewritable DVD disc, click “Burn” button to open the burning settings window, in which you can set the destination, DVD volume, write speed and copies, as well as set the video quality, TV standard, audio bit rate and channels as required.
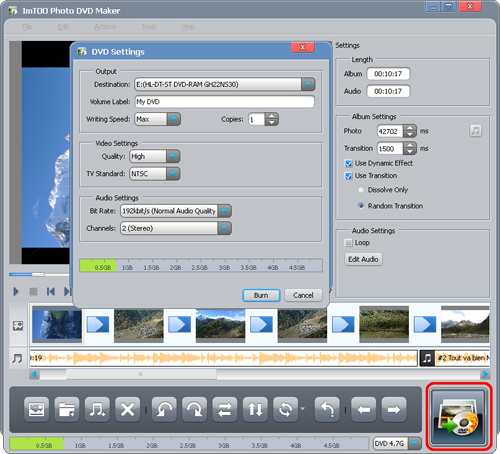
After the above settings, click “Burn” button on the settings window to start burning
Part 2: More Applied Functions
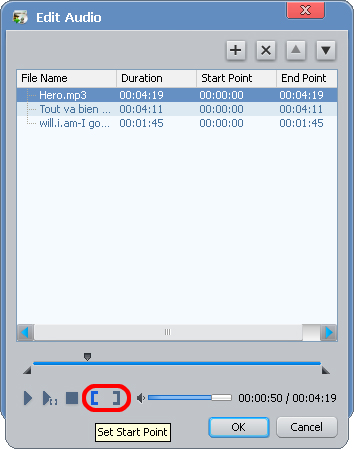
• Trim audio clips as DVD background music
Click “Edit Audio” button to open the “Edit Audio” window and select one audio file. Click “Play” button and during the playing you can set the start and end points of the audio clip by clicking on “Set Start Point” and “Set End Point” button to meet your need. And then click “OK” to go back to the main window.
• Classification and sorting function
The application qualifies you to sort the added photos and audios.
Right click on the photo/audio list, select “Sort By” option from the right click menu and open the next level catalog. You can sort files by “Name”, "Date”, "Type”, "Size” in descending or ascending. Then the photos or audios in the list will be sorted according to your configuration.
• Using Dynamic Zoom in Effect in Photo Preview
This Photo DVD Maker enables dynamic zoom in effect in photo preview to make photos look more vivid. After importing photo collections, check “Use Dynamic Effect” option and click “Play” button to preview. The dynamic effect will be added into each picture automatically to let you have a fun watching.
• Adjust photo duration to audio duration
If the duration of photos is not accordant with that of audio files, you can adjust the photo duration to the audio duration. To do this, please click the music button in the “Album Settings” area of the setting panel, then the photo duration will be automatically adjusted to the audio duration.

• Audio Management
Click “Edit Audio” button in the “Edit Audio” area on the settings panel to open the audio management window, in which you can do the following operations:
Click “Add” button to add one or more audio files.
Select a file in the file list, click “Delete” button to delete the selected file from the list.
Click “Move Up” or “Move Down” button to adjust the order of the audio files.
Click “OK” button to return to the main window.