
-
- iTransfer Platinum Mac

- iPhone Transfer Platinum Mac
- iPad Mate Platinum Mac

- PodWorks Platinum Mac
- iPhone Ringtone Maker Mac
- iPhone Transfer Plus Mac
- iPad Mate for Mac
- PodWorks for Mac
- iPhone Contacts Transfer Mac
- DVD to Video for Mac
- DVD to MP4 Converter for Mac
- DVD to iPhone Converter for Mac
- Blu-ray to Video Converter for Mac
- DVD to iPad Converter for Mac
- DVD to Audio Converter for Mac
- DVD Creator for Mac
- Video Converter for Mac
- MP4 Converter for Mac
- 3D Movie Converter Mac
- Video Editor 2 for Mac
- Audio Converter Pro Mac
- YouTube Video Converter for Mac
- Download YouTube Video for Mac
- YouTube HD Video Downloader Mac
- YouTube to iTunes Converter Mac

- YouTube to iPhone Converter Mac
- HEVC/H.265 Converter for Mac
- iTransfer Platinum Mac
- More
ImTOO MPEG to DVD Converter Guide
How to burn MPEG videos to DVD discs? This guide will show you how to make a DVD from MPEG video files with ImTOO MPEG to DVD Converter step by step.
Step 1: Download and Install ImTOO MPEG to DVD Converter 6
After installation, run the software and insert a DVD (DVD-R, DVD+R, DVD-RW, DVD+RW, DVD+R DL, DVD-R DL, DVD-5/DVD-9).
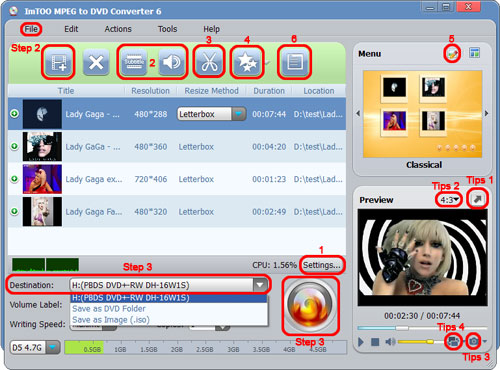
Step 2: Add Video Files
Click "Add Video File(s)..." button or select "Add Video File(s)..." from "File" menu to load MPEG videos. And the video preview thumbnails will appear in the main interface, along with some basic properties.
Step 3: Burn MPEG Videos to DVDs/DVD Folder/ISO Image
Click "Destination" drop-down bar to select a DVD drive and click "Burn" button to start burning.
If you have no DVD discs available, select "Save as DVD Folder" or "Save as Image (.iso)" alternatively, and click "Burn" to convert your MPEG videos to DVD folder or ISO image on your computer.
Add more special effects, please jump to More Skills.
Tips:
1. Preview videos in the preview window or the stand-alone player.
2. Two zoom modes available: 4:3 and 16:9.
3. Take snapshots while previewing videos.
4. Switch between the original frame and the output frame.
1. Customize Parameters
2. Add Subtitles and Audio
3. Clip
4. Video Effects
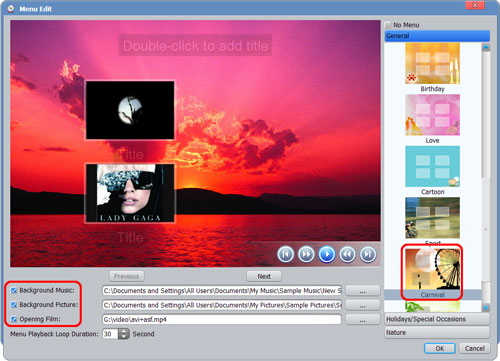
5. Edit DVD Menu
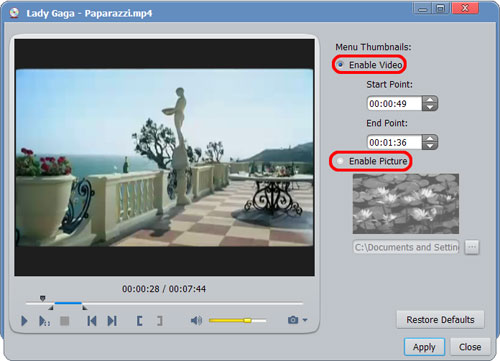
6. Menu Clip
Order: Right click one video file you want to move and select "Move Up" or "Move Down" to arrange its order. Or directly drag and drop the file.
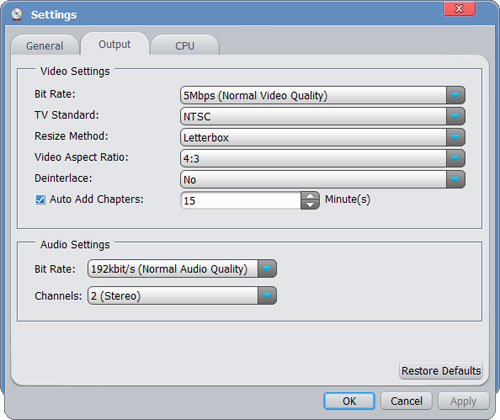
Output Settings: Click "Settings..." button and go to general tab and adjust parameters you like, including Bit Rate, TV Standard (NTSC for USA, Canada and Japan; PAL for Europe and Asia), Channels, Aspect Ratio and other parameters.
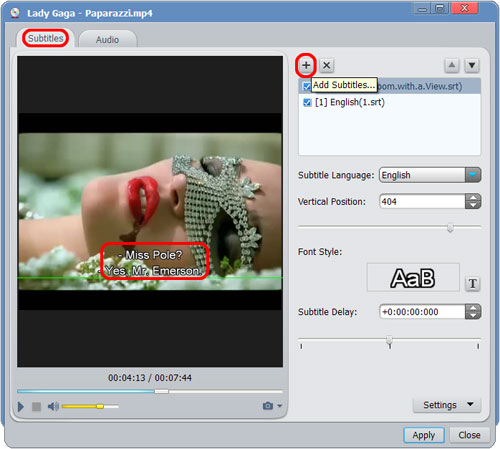
Click "Subtitles" or "Audio" button, and see the dialog as below.
Subtitles: Click "Add Subtitles..." button to select the subtitle files you want to add. You can change Vertical Position, Front Style, and Subtitle Delay.
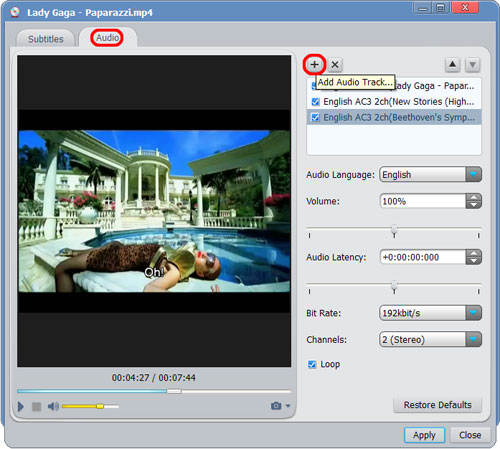
Audio: Click "Add Audio Track..." button to select the audio file you want to add. You can change Volume, Audio Latency, Bit Rate and Channels.
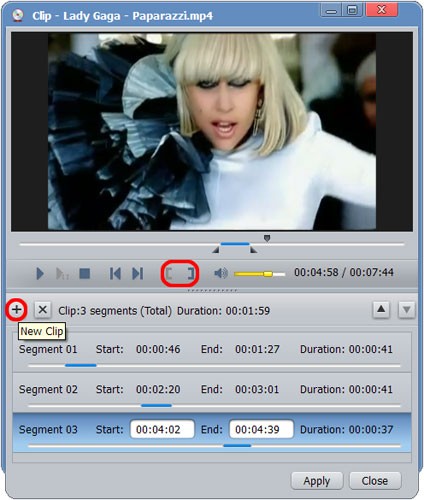
Click "Clip" button to open Clip window. Drag and drop the cursor to set the start and the end point for your clip. Click "New Clip" to create more clips.
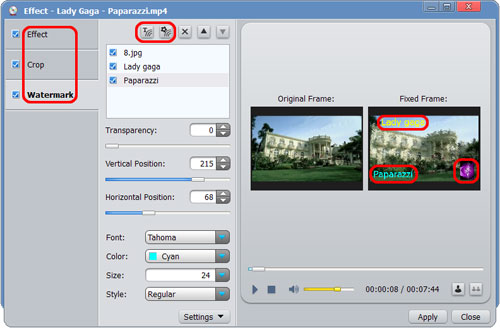
Click "Effect" button and open Effect window.
Artistic Effects: Go to Effect tap and check one or more effects you want to apply to your video.
Crop: Go to Crop tap and specify the size to crop the video frame, or drag and drop the cursor to change the frame size.
Watermark: Go to Watermark tap. Click "Add Text Watermark" and input the text you want. Adjust Transparency, Position, Font, Color, Size and Style to get the desired effects.
Click "Add Picture Watermark" to select the picture you want. Adjust Transparency, Position and Size.
Comparing Preview: Click "Comparing Preview" button to preview the original and the fixed frame with the effects applied.
Tips:
5.You can add more than one text and picture watermark for one video file.
6. Artistic effects including Haze, Mosaic, Sand, Carving, Negative and more.
Click "Edit" button in the Menu field and open Menu Edit window. Select a template from the menu templates offered in the application, or select your own picture from your computer. You can also select music and opening film, and change loop duration to enrich your DVD menu.
Click "Menu Clip" to open the window. For menu video clip, set the start and the end point for the video played in the DVD menu. For menu picture, select the picture from your computer.