
-
- iTransfer Platinum Mac

- iPhone Transfer Platinum Mac
- iPad Mate Platinum Mac

- PodWorks Platinum Mac
- iPhone Ringtone Maker Mac
- iPhone Transfer Plus Mac
- iPad Mate for Mac
- PodWorks for Mac
- iPhone Contacts Transfer Mac
- DVD to Video for Mac
- DVD to MP4 Converter for Mac
- DVD to iPhone Converter for Mac
- Blu-ray to Video Converter for Mac
- DVD to iPad Converter for Mac
- DVD to Audio Converter for Mac
- DVD Creator for Mac
- Video Converter for Mac
- MP4 Converter for Mac
- 3D Movie Converter Mac
- Video Editor 2 for Mac
- Audio Converter Pro Mac
- YouTube Video Converter for Mac
- Download YouTube Video for Mac
- YouTube HD Video Downloader Mac
- YouTube to iTunes Converter Mac

- YouTube to iPhone Converter Mac
- HEVC/H.265 Converter for Mac
- iTransfer Platinum Mac
- More
ImTOO DVD to iPhone Converter Guide

ImTOO DVD to iPhone Converter eases you from the tiresome job to convert DVD and convert DVD to iPhone (MPEG-4), MP4, iPhone music MP3, WAV, M4A, and accomplish them with great quality and super fast converting speed! With it, you will find put and watch DVD movies on iPhone is so easy.
Compared with other software, ImTOO DVD to iPhone Converter has more settings you can customize, e.g. custom file size through setting video bitrate, convert DVD's any segment, select target subtitle, move position of the subtitle, or select audio track.
Step 1: Launch ImTOO DVD to iPhone Converter and Import DVD
Click "Open DVD" button or File>Open DVD/IFO Files, select a DVD (or DVD Folder or IFO file) in the dialog box that opens, and load it. The Loaded DVD's information, such as chapter, title, etc., will be shown in the file list.

Tip1: Get DVD information.
After loading DVD, if the network is connected, click Get Disc info button in the toolbar, or click Edit>Get Disc Info in the menu, the software will retrieve loaded DVD information from Web database, and display the information in the file list, such as title name and chapter name.
Tip2: Take snapshot.
Select a video file in the file list, click Play button in the video preview window. When the video jumps to the image you like, click Snapshot button under the preview window to store the image in the snapshot folder.
You can set the snapshot folder by yourself. To do this, click Config snapshot folder from Settings drop down list, select the snapshot folder you want in the dialog box that opens.
Step 2: Select output format
Select one or more files in the list, click Profile drop-down button, select an output format for selected files in the drop down list that opens.
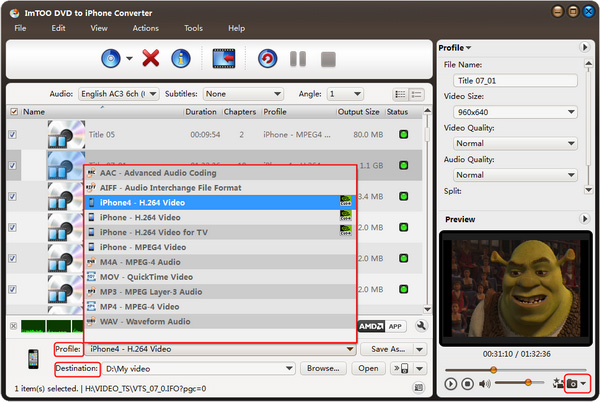
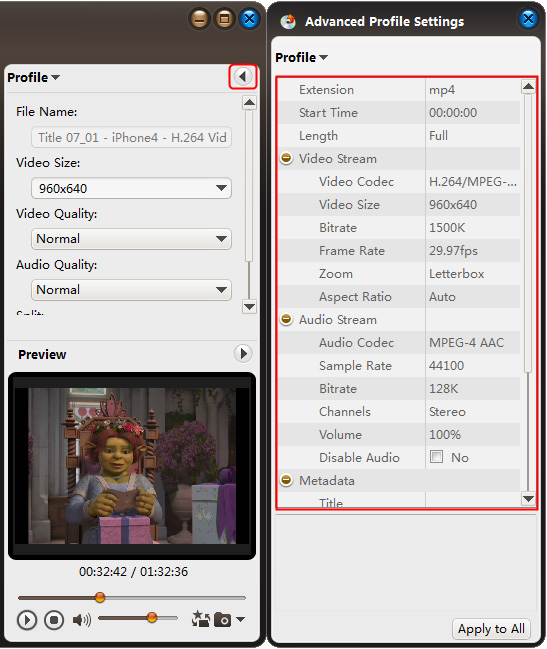
Tip1: To adjust output settings, you can set the detailed parameters of output format in the profile panel of right window. The customized profile can be saved for future use by the "save as" button beside Profile box.
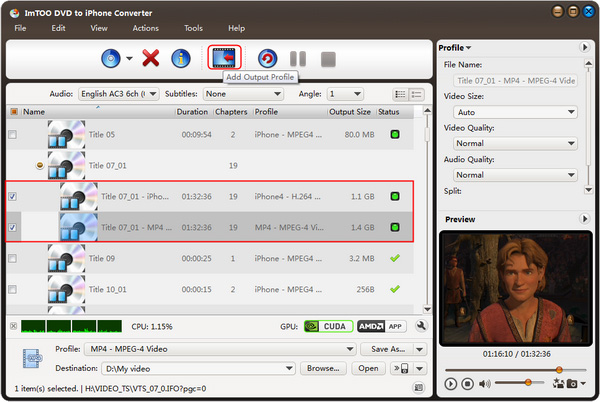
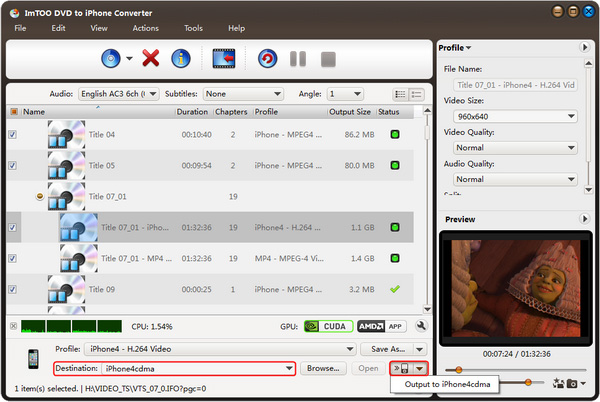
Tip2: Set multiple output formats for one file.
The software supports to output multiple files with different formats for one video. To do this:
1. Select a file in the file list.
2. Select an output format in the Profile.
3. Click Add profile button, the software will create a profile directory under the selected file automatically.
4. Select a new profile, click profile dropdown button, and select a new output format from the list.
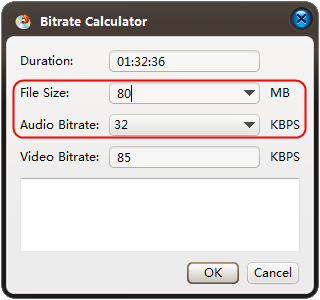
Tip3: Custom output size.
The software provides customizing the size of the output file.
To do this, please click Tools>Bitrate Calculator to open Bitrate Calculator dialog box, select a file size you want, or enter the file size in the textbox directly.
Meanwhile, you can also set audio bit rate and video bit rate in this dialog box.
Step 3: Set output folder
Click Browse button in setting panel, select a destination folder in the dialog box that opens, and click OK.
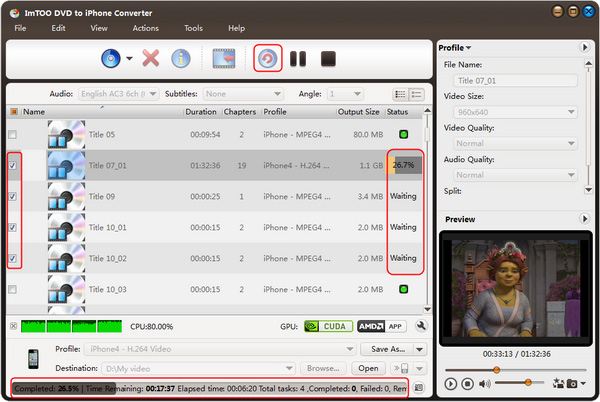
Step 4: Extract file
After finishing the above settings, check the needed file to extract in the file list, click Start Converting button on the main interface, to start extracting the file. You can view the progress of the extracting process from the progress bar at the bottom of the window.
Tip1: You can click Pause Converting button to pause the extracting process and Stop Converting button to cancel the process as required.
Tip2: You can choose to run it background at File> Run Background.
Tip3: You can transfer converted files to your iPhone directly by this software.
Related Tips: