
-
- iTransfer Platinum Mac

- iPhone Transfer Platinum Mac
- iPad Mate Platinum Mac

- PodWorks Platinum Mac
- iPhone Ringtone Maker Mac
- iPhone Transfer Plus Mac
- iPad Mate for Mac
- PodWorks for Mac
- iPhone Contacts Transfer Mac
- DVD to Video for Mac
- DVD to MP4 Converter for Mac
- DVD to iPhone Converter for Mac
- Blu-ray to Video Converter for Mac
- DVD to iPad Converter for Mac
- DVD to Audio Converter for Mac
- DVD Creator for Mac
- Video Converter for Mac
- MP4 Converter for Mac
- 3D Movie Converter Mac
- Video Editor 2 for Mac
- Audio Converter Pro Mac
- YouTube Video Converter for Mac
- Download YouTube Video for Mac
- YouTube HD Video Downloader Mac
- YouTube to iTunes Converter Mac

- YouTube to iPhone Converter Mac
- HEVC/H.265 Converter for Mac
- iTransfer Platinum Mac
- More
H264 to DVD - How to convert H264 to DVD? 

I downloaded some movies from internet with H.264 MPEG4 format.But they take up too much space on my hard disk, so I want to burn the video into DVD disk so that I can save space and preserve the movies permanently. Is there any program can help me to solve this issue? Thanks a lot.
ImTOO DVD Creator is featured as a professional DVD burner and this tip will show you how to convert H264 videos to DVD and burn H264 videos to DVD disc step by step.
Guide: How to convert H264 to DVD
Tools Required:
- DVD Creator
- DVD Creator for Mac
- Blank DVD Disc
Step 1: Insert a blank DVD into your DVD drive.
Step 2: Add H264 files into the software.
Click "Add Video Files" button or "File -> Add Files" from menu to load H264 videos. This software also supports dragging and dropping.
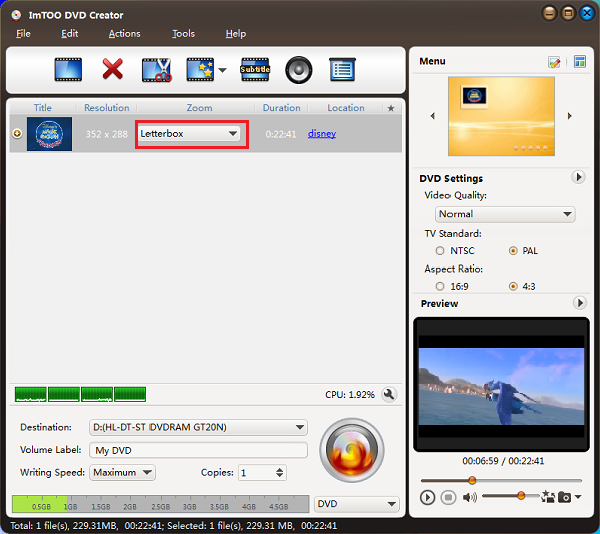
Step 3: Choose Resize Option accoding to your persoanl preference.
Generally speaking, if you want to use DVD to watch movies on DVD player, we recommand you to choose "Pan and Scan" to get the best visual effect. But this may take more time to convert.
- Letterbox: add black stripes to fit the output aspect ratio.
- Pan and Scan: crop frame to fit the output aspect ratio.
- Full Screen: stretch and compress frame to fit the output aspect ratio.
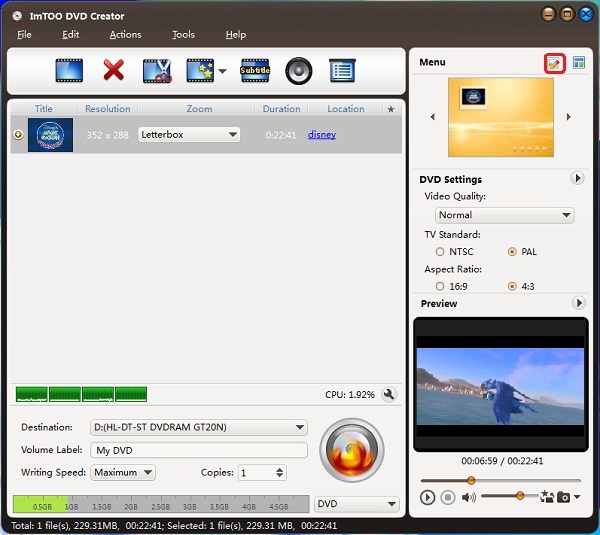
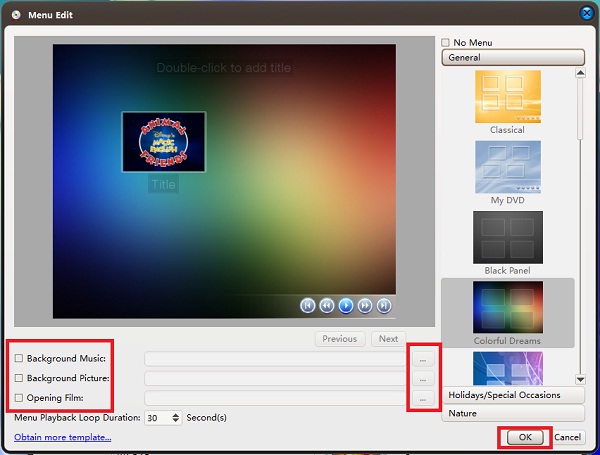
Step 4: Choose a DVD menu for your DVD, and the selected template will be displayed on the above of the right area.
Click the "Template" button to choose a menu you like.
You can also set "Background Music" and "Background Picture".
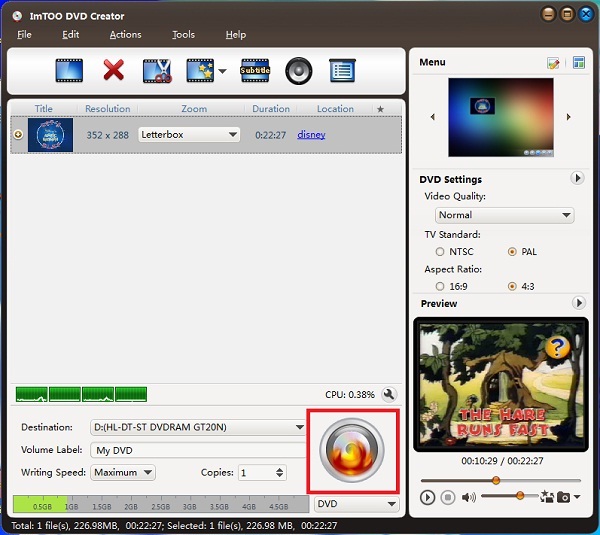
Step 5: Choose Output format.
You can insert a blank DVD into your DVD dirve to convert and burn H264 videos to DVD disc directly. You can also choose to convert to DVD folder and ISO image files.

Step 6: Choose video standard according to your region.
Select "NTSC" or "PAL" video system by clicking the "Preferences" item under the "Tools" Menu.
PAL format is used in Western European countries and NTCS is in US, Asian countries and American Continent.
See more: What is NTSC and PAL video standard or system?

Step 7: Convert H264 to DVD.
Click "Start Burn" button to start your H264 to DVD burnning process.
Tip:
4:3 or 16:9: Another imprtant option in the Video Aspect. 4:3 is used in Normal TV and 16:9 is in HDTV, therefore, be careful to set this option.
OK, done.
What is H264 video?
H.264 is a next-generation video compression format. H.264 is also known as MPEG-4 AVC. Developed for use in high definition systems such as HDTV, Blu-ray and HD DVD as well as low resolution portable devices such as Sony’s PSP and Apple’s iPod, H.264 offers better quality at lower file sizes than both MPEG-2 and MPEG-4 ASP (DivX or XviD).