
-
- iTransfer Platinum Mac

- iPhone Transfer Platinum Mac
- iPad Mate Platinum Mac

- PodWorks Platinum Mac
- iPhone Ringtone Maker Mac
- iPhone Transfer Plus Mac
- iPad Mate for Mac
- PodWorks for Mac
- iPhone Contacts Transfer Mac
- DVD to Video for Mac
- DVD to MP4 Converter for Mac
- DVD to iPhone Converter for Mac
- Blu-ray to Video Converter for Mac
- DVD to iPad Converter for Mac
- DVD to Audio Converter for Mac
- DVD Creator for Mac
- Video Converter for Mac
- MP4 Converter for Mac
- 3D Movie Converter Mac
- Video Editor 2 for Mac
- Audio Converter Pro Mac
- YouTube Video Converter for Mac
- Download YouTube Video for Mac
- YouTube HD Video Downloader Mac
- YouTube to iTunes Converter Mac

- YouTube to iPhone Converter Mac
- HEVC/H.265 Converter for Mac
- iTransfer Platinum Mac
- More
How to transfer video to DVD? 

Is it possible to transfer your home videos recorded by digital camcorders, or collected wonderful movies from your friends , or video clips downloaded from video sharing sites to DVD? Transferring videos to DVD disc is a perfect way to save your video files for backup and play them on all DVD portable players and TV. Here we will introduce you a handy and professional video to DVD burner software to complete the video to DVD transferring, so that you can enjoy a good time watching movie with your family at home.
Tools Required:
- Windows Users - Video to DVD Converter - Supports converting and burning almost all popular video formats such as AVI, DivX, MPEG, MKV, MP4, FLV, MOV, TS, MTS, M2TS, WMV, DV, 3GP, etc. to DVD. Compatible with all popular DVD types. Able to create personalized DVD by many video editing functions.
- Mac Users - Video to DVD Converter for Mac -Mac OS X Snow Leopard, Lion, and Mountain Lion supported.
- DVD disc
Guide: How to transfer video to DVD
Note: This step-by-step guide is for windows users. The Mac version's interface is the same as windows version. Mac users can also follow this steps to complete the conversion.
Step 1:Free download the software according to your operating system. Install and run it.
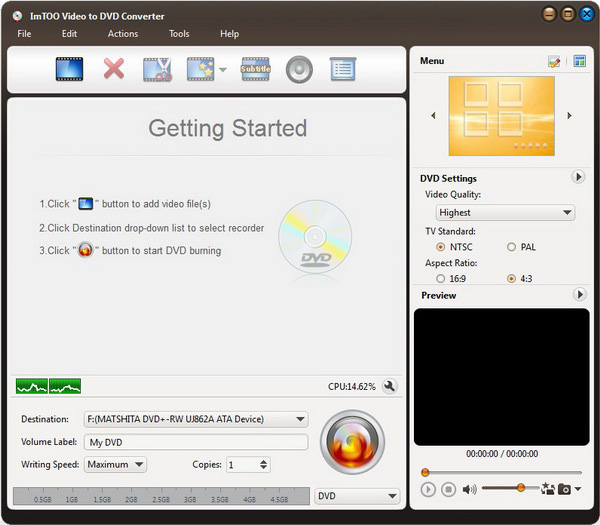
Step 2: Add files.
Click "Add Video File(s)" button on the top menu to open the loading files window. Choose videos you want and press "Open" to import them into the program.
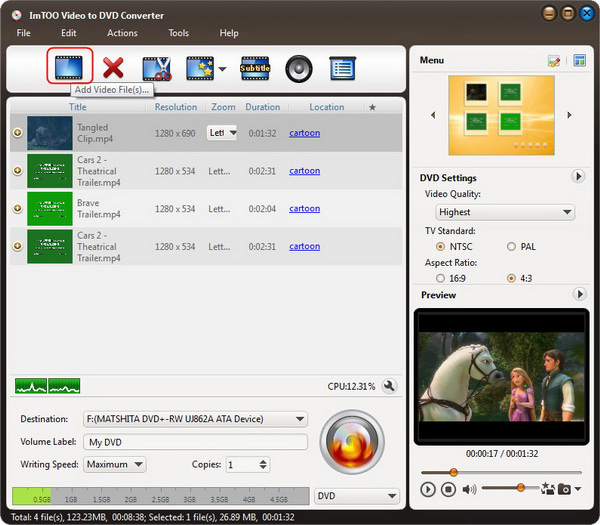
Tips: You can click "Add Folder" button to load a file folder.
Step 3: Add subtitles and audio tracks.
After loading a video file, its subtitle and audio track information will be listed under the file node in the file list.
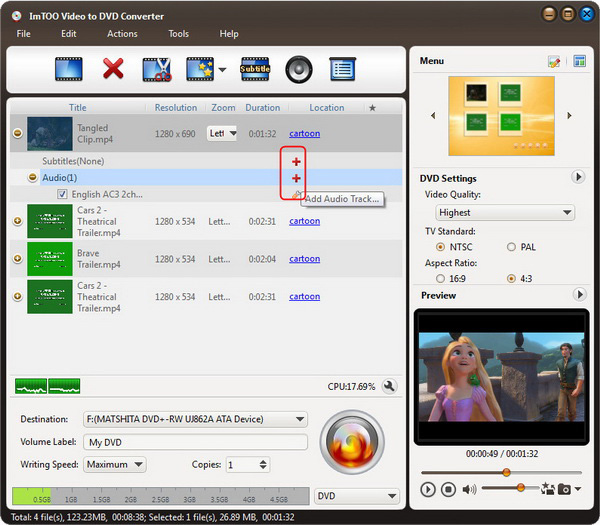
To add subtitles,click on the "+" sign ("Add Subtitles...") on the right of the subtitle item to load the required subtitle file(s) from your computer.
To add audio tracks,click on the "+" sign ("Add Audio Track...") on the right of the audio track item to load the required audio track(s) from your computer.
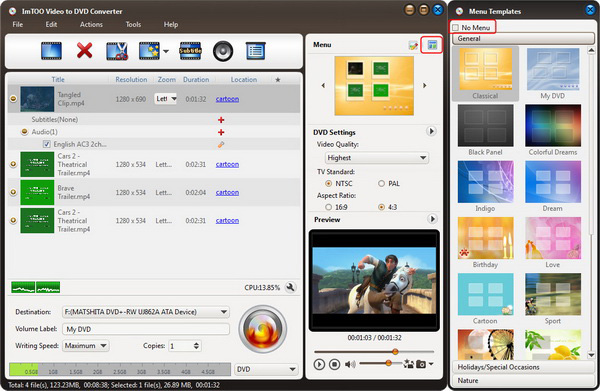
Step 4: Create a DVD menu.
Click on the "Templates" button from the "Menu" panel in the top right-hand window and choose a template from the list to quickly create a simple DVD menu.
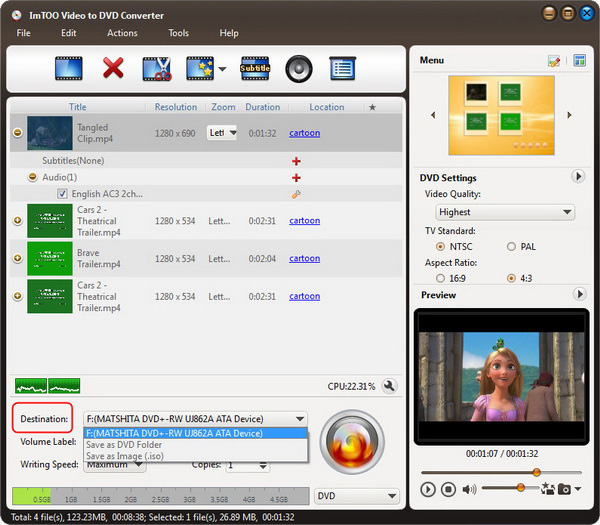
Step 5: Set output target.
Click the "Destination" drop-down button from the main window, and choose DVD disc, DVD folder, or ISO image file from the drop-down list as the output target.
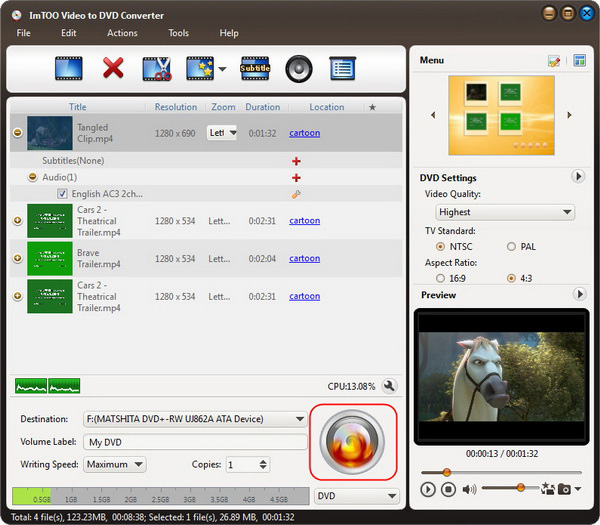
Step 6:Start burning.
Choose the write speed and the number of copies required, and then click "Burn" to start the burning process.
Ok,Video to DVD Converter can help you to create a wonderful DVD disc with a few steps. Please enjoy it now.